What to Know
- The easiest way is to press a key during booting, which is usually F2. However, this may not always be the case.
- Or, shift-click Restart from Start; then, Troubleshoot > Advanced Options > UEFI Firmware Settings > Restart.
- Or, enter PowerShell command “shutdown /r /o /f /t 00“: then, follow the steps outlined above after Troubleshoot.
This article explains how to access the BIOS on a Windows 11 PC. These steps will also largely work on Windows 10, too.
Be careful when accessing your BIOS. It’s a powerful tool for troubleshooting issues, but if you change settings without understanding what they do, you can create more problems than you solve.
How to Access BIOS During Startup
The quickest way to get into your BIOS on a Windows computer is by pressing a particular key during the booting process of your PC, directly leading you into the BIOS.

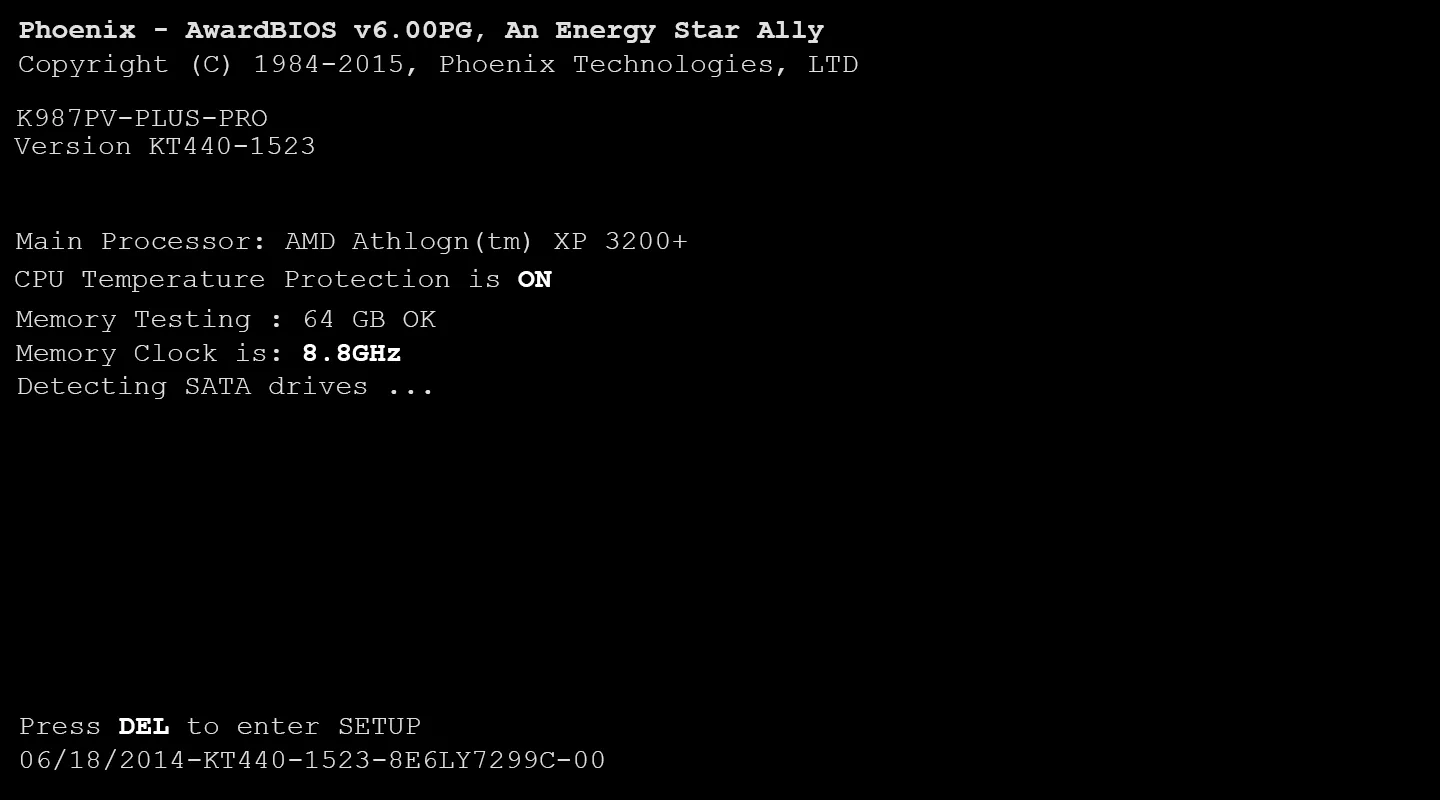
When you turn your computer on, it will display a splash screen with a logo tied to your motherboard or computer brand. At the bottom of the screen, you’ll likely find a message that reads, “Press [certain key] to enter the BIOS.”
Usually, this key is F2, but not always. If you don’t see a message explaining what key to use during startup, you can search online for the key relevant to your specific computer.
Once you find out the correct key, as long as you press it during startup, you’ll immediately enter your BIOS afterward.
Here are examples of BIOS keys from some major manufacturers:
- ASUS: F2
- Acer: F2 OR Delete
- Dell: F2 OR F12
- HP: F10
- Lenovo desktops: F1
- Lenovo laptops: F2 OR Fn + F2
- Microsoft Surface: Press and hold Volume Up
- Origin PC: F2
- Samsung: F2
- Toshiba: F2
How to Access BIOS From the Start Menu
Another easy way to access your BIOS is through the Windows 11 Start Menu.
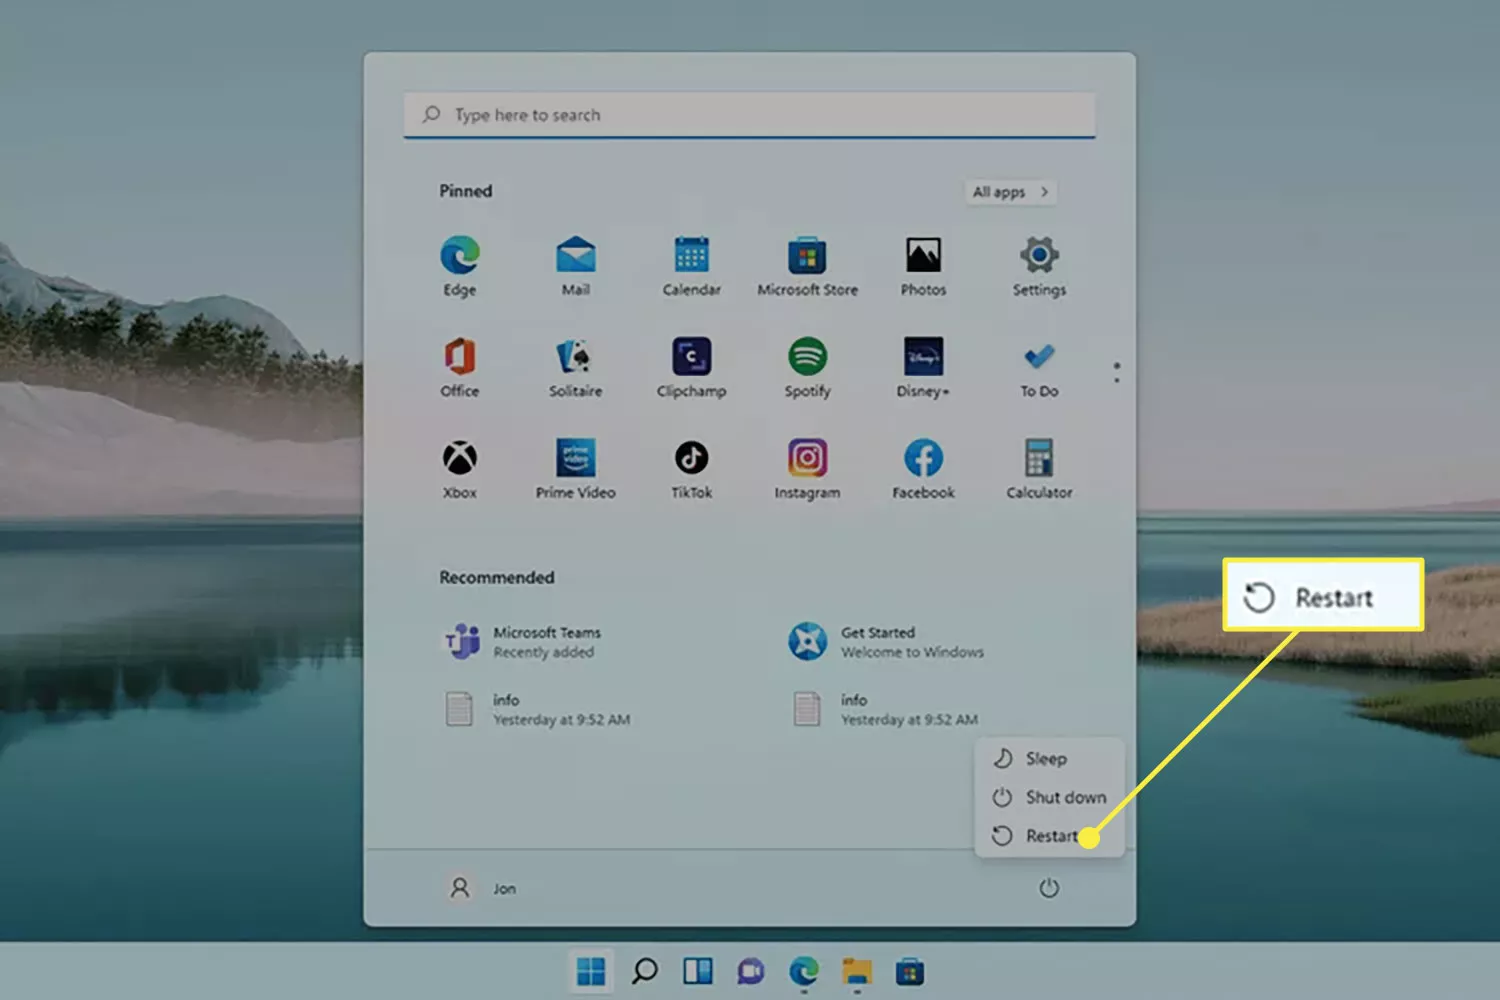
- Hold down the Shift key when you click the Restart button in the Start Menu.

- Your computer won’t restart as normal when you click Restart. Instead, a new screen will appear. Select Troubleshoot.
- Choose Advanced Options.
- Click UEFI Firmware Settings.
- Finally, choose Restart. Your computer will restart and load you into your BIOS.
Alternatively, open your Windows 11 Settings app, go to System > Recovery > Restart now, and pick up from Step 2 above. However, working directly from the Start menu is generally the easiest method.
How to Access BIOS From PowerShell
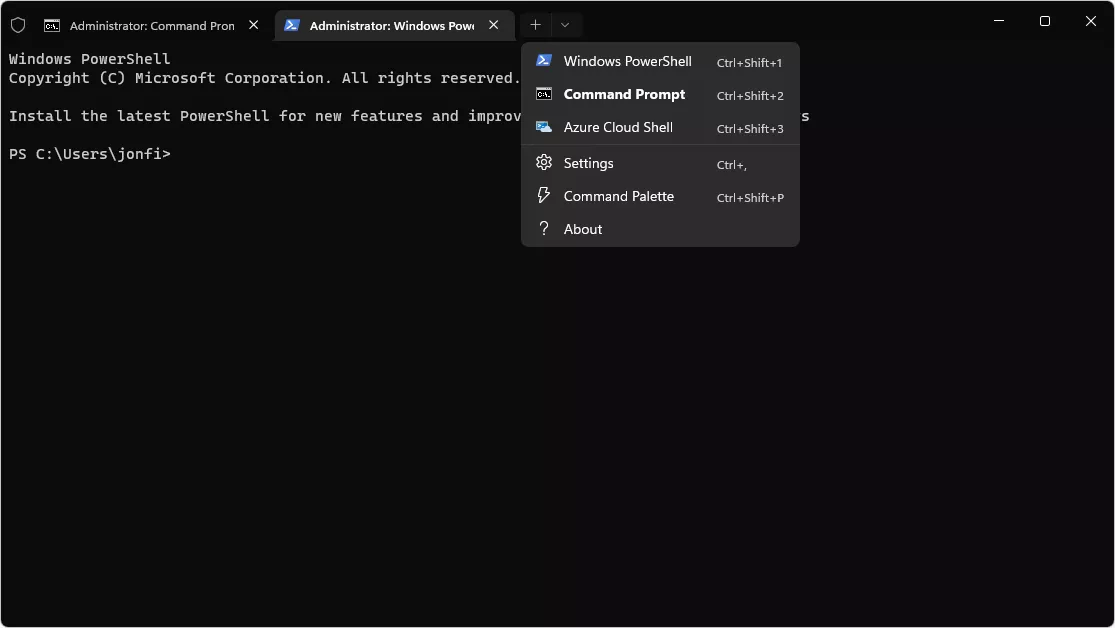
Lastly, you can access your BIOS in Windows 11 by inputting a command into either the Command Prompt or PowerShell. Here’s how to open up one of those on Windows 11.

Once you have PowerShell or the Command Prompt open, input the following command, and then press Enter:
Like the method outlined above, your computer won’t restart into your familiar Windows desktop; rather, a new screen will suddenly appear. From there, go to Troubleshoot > Advanced Options > UEFI Firmware Settings > Restart. Your PC will restart into the BIOS.
Tips and Tricks After Entering BIOS
The BIOS interface isn’t the same as the normal Windows desktop. Here are a couple of things to keep in mind.
Once your BIOS is open, you may or may not be able to use your mouse, so you might end up needing to rely on your keyboard.
When you’ve finished whatever you need to do in your BIOS, and you exit, your computer will boot normally into your Windows 11 desktop. You don’t have to do anything differently during startup.


