What to Know
- Open Taskbar settings > Personalization > Taskbar > turn off the toggle switch for Copilot in Windows.
- In Windows 11 Home, use the Registry Editor to create a new key for Copilot.
- In Windows 11 Professional, use the Group Policy Editor to turn off Copilot.
This guide will show you how to hide the Copilot button from the desktop and also disable the Copilot button more permanently.
How to Hide the Copilot Button in Windows 11
To hide Microsoft Copilot, use a toggle switch in your taskbar personalization settings. The fastest way to access these settings is directly from the taskbar.
- Click an empty spot on the taskbar.

- Select Taskbar settings from the menu.
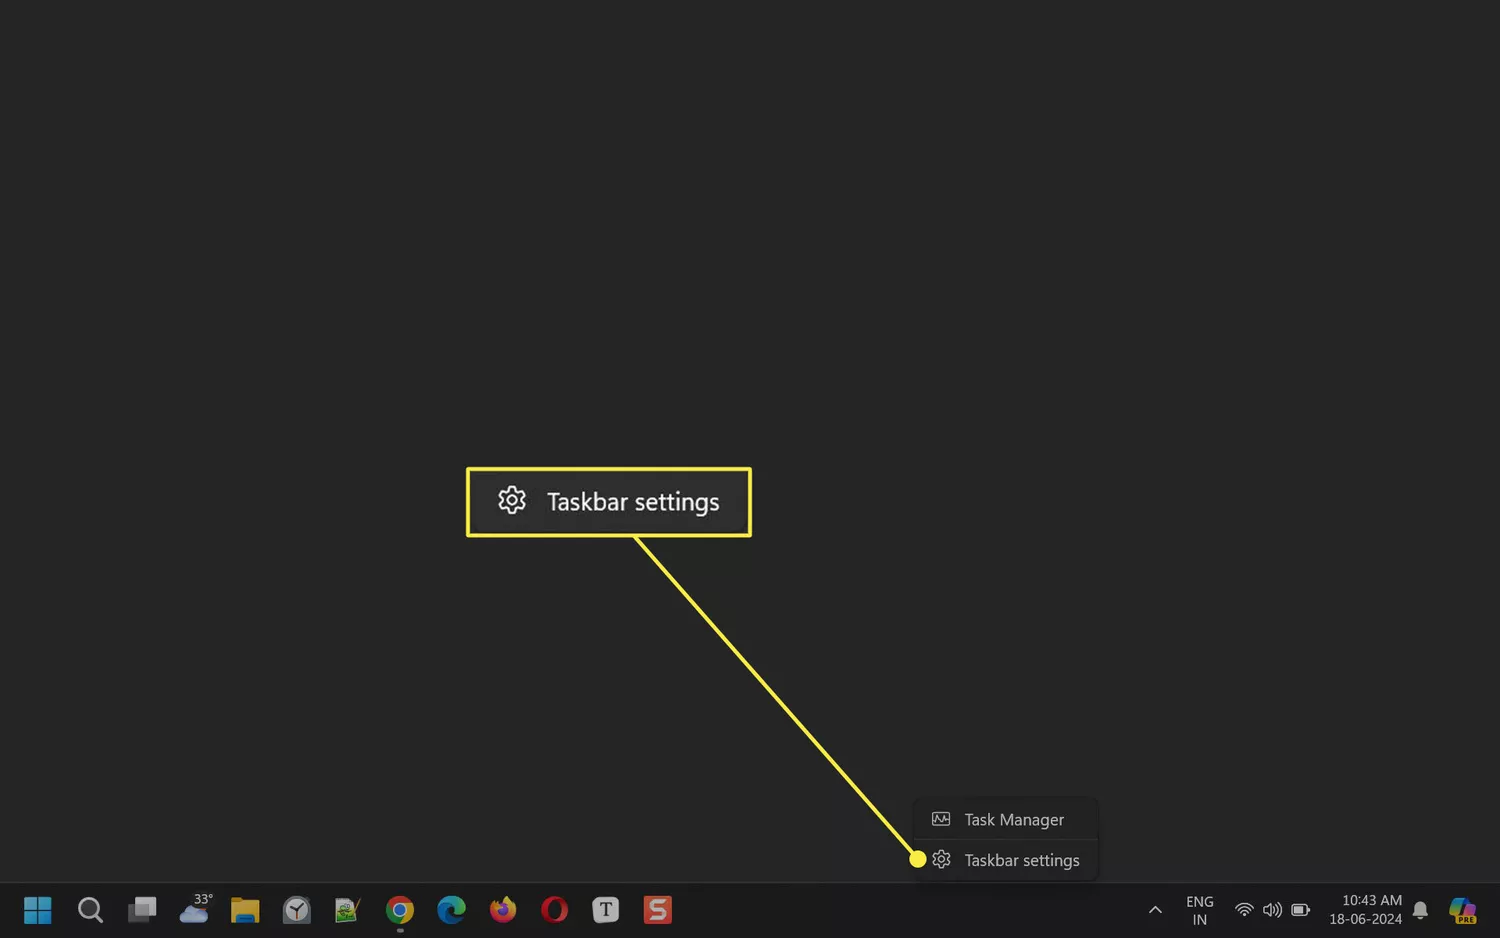
- Turn off the toggle switch for Copilot in Windows under Taskbar items.
How to Remove the Copilot Button From Settings
You can access the same toggle switch from the Settings screen:
- Select Start > Settings from the menu. Alternatively, press the Windows + I keys on your keyboard.
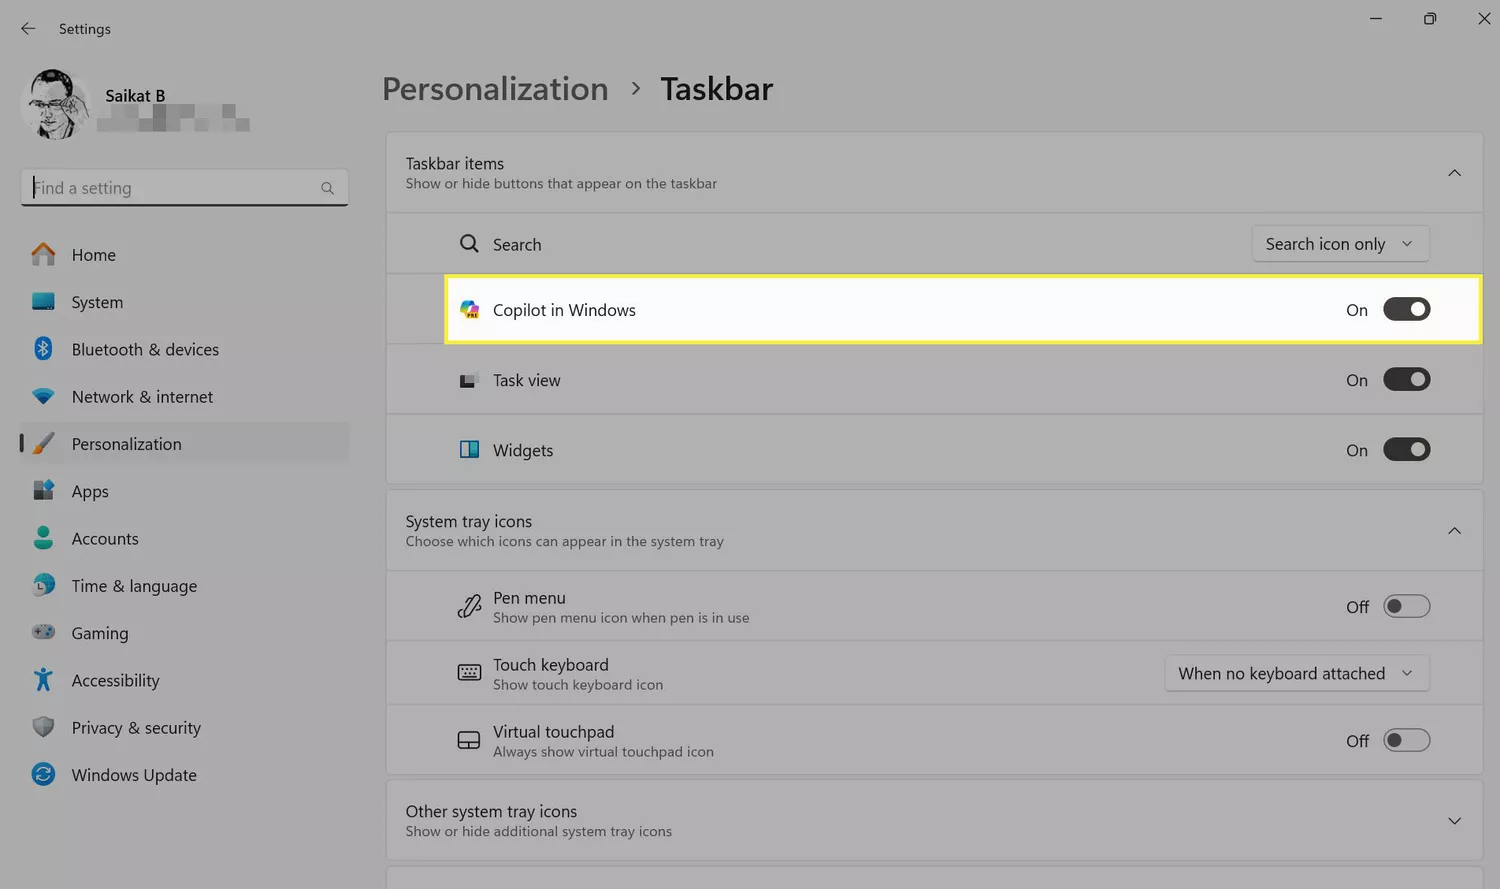
- Select Personalization on the left, and then scroll down and open Taskbar. Here, you can control which buttons appear on the taskbar.
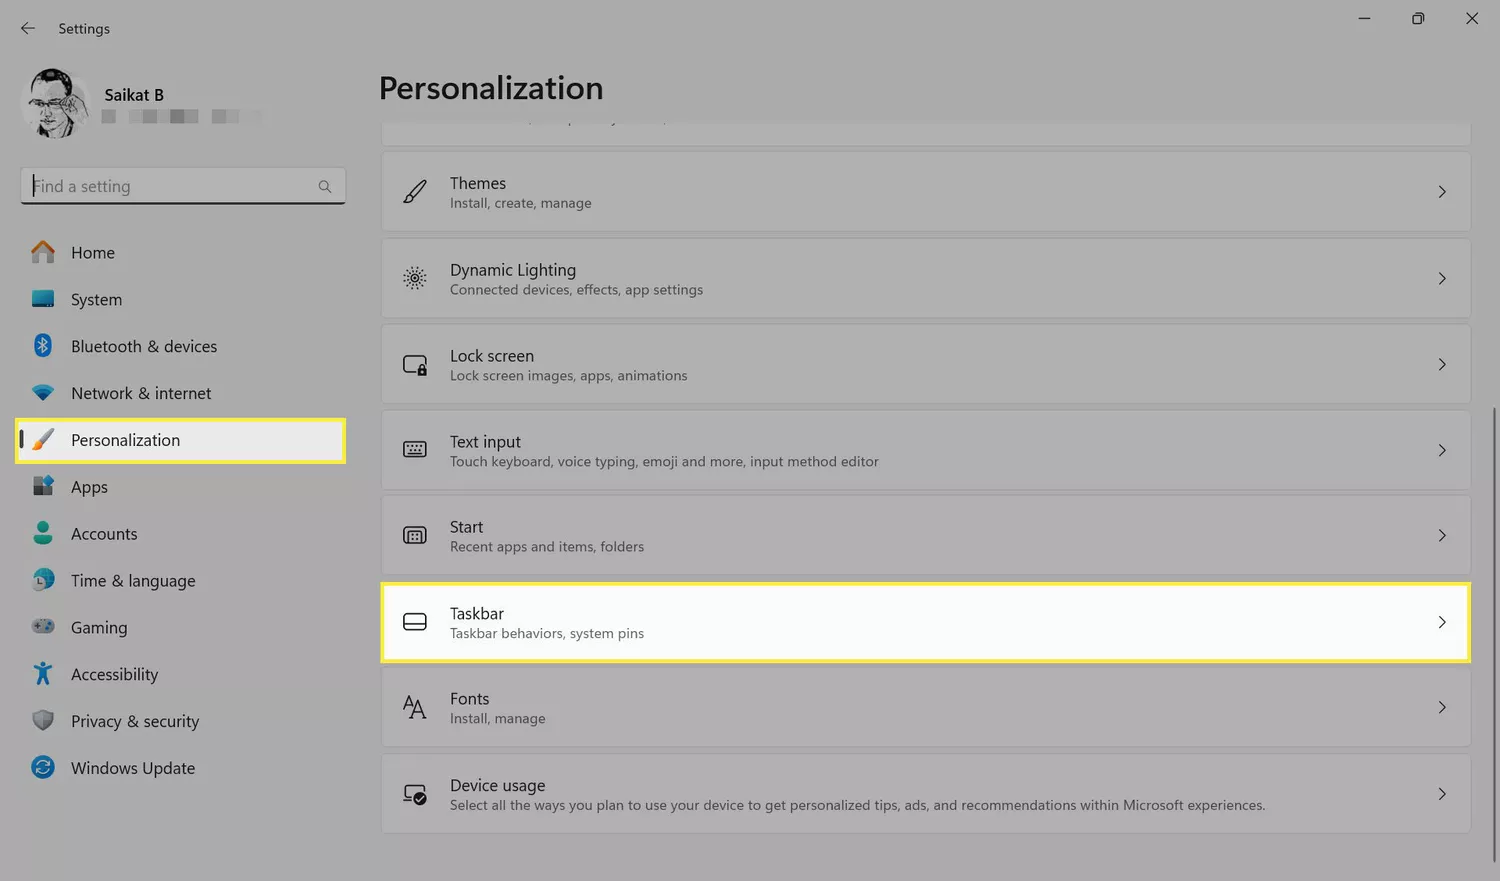
- Turn off the toggle switch next to Copilot in Windows.

- Return to the desktop. You should no longer see the Copilot button on your taskbar.
This only hides the button; you can still open Copilot in a separate desktop sidebar by pressing the Windows + C shortcut key.
Can You Disable Microsoft Copilot in Windows?
Since Copilot is integrated into Windows 11, you can’t uninstall it like a typical app. However, Windows 11 users on the Professional, Education, or Enterprise editions can use the Group Policy Editor to disable it more permanently. Users on Windows 11 Home will need to fall back on a Registry tweak.
Once you apply these methods, Copilot won’t reappear when you use the keyboard shortcut. Don’t worry; these methods are reversible, allowing you to easily restore Copilot if you want to benefit from generative AI on Windows later.
How to Disable Copilot in Windows 11 Home
Touching the registry is always risky for those who are not knowledgeable about it. Always create a backup of your registry and a restore point as failsafes if things go wrong. Then, follow the steps to disable Microsoft Copilot with the Registry Editor.
- Open Start and type “registry” in the search box to find the Registry Editor.
- Scroll down the tree view on the left to the following registry entry: HKEY_CURRENT_USER\Software\Policies\Microsoft\Windows
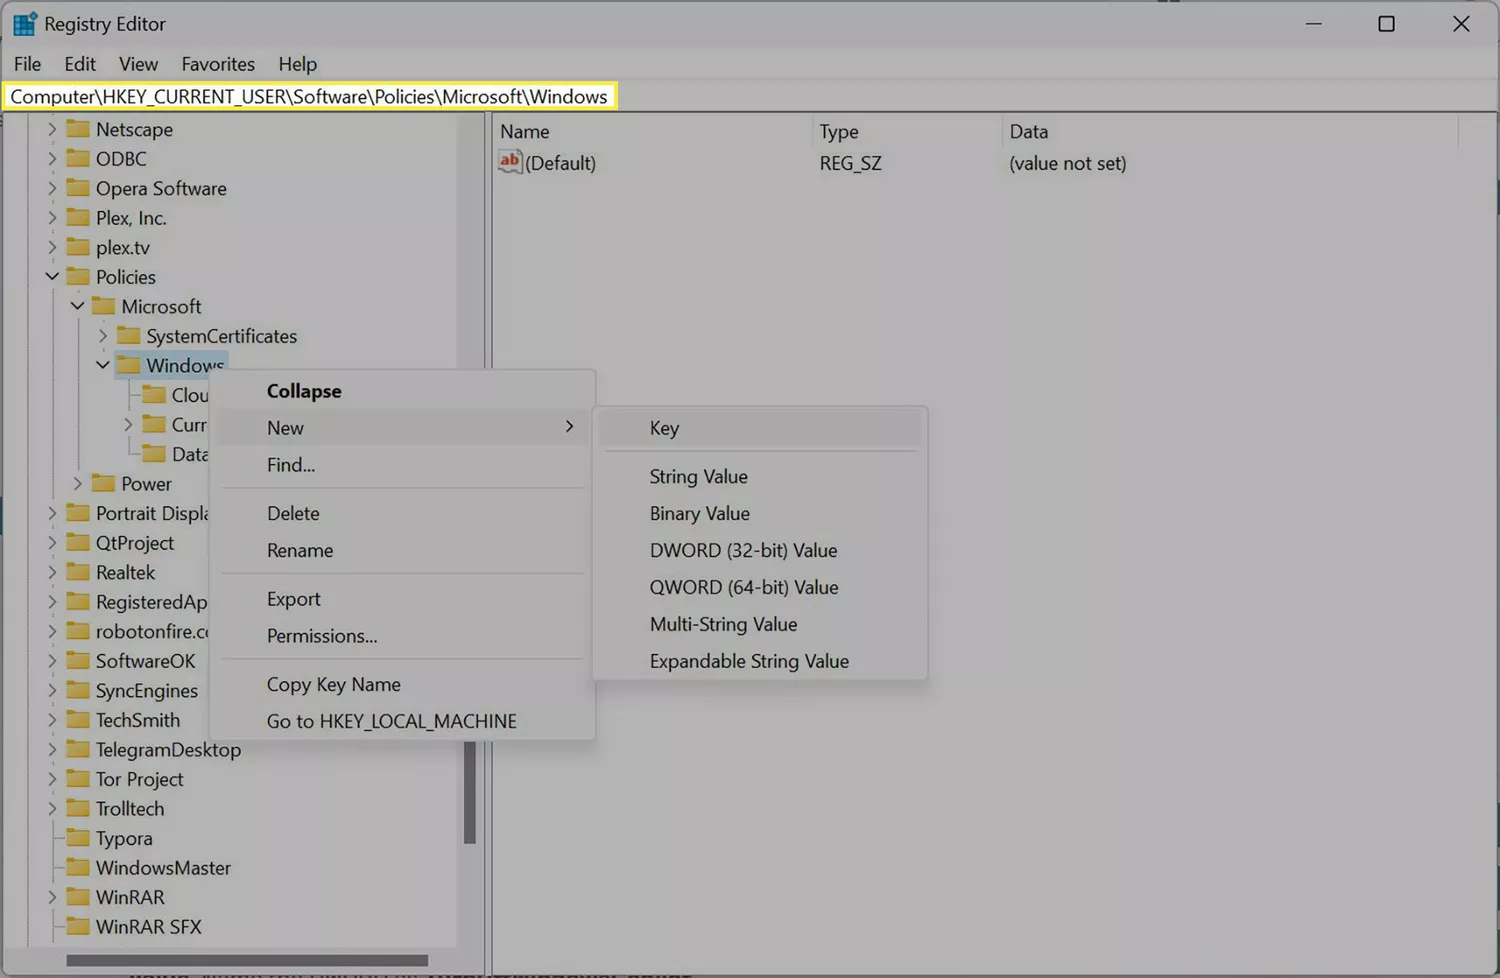
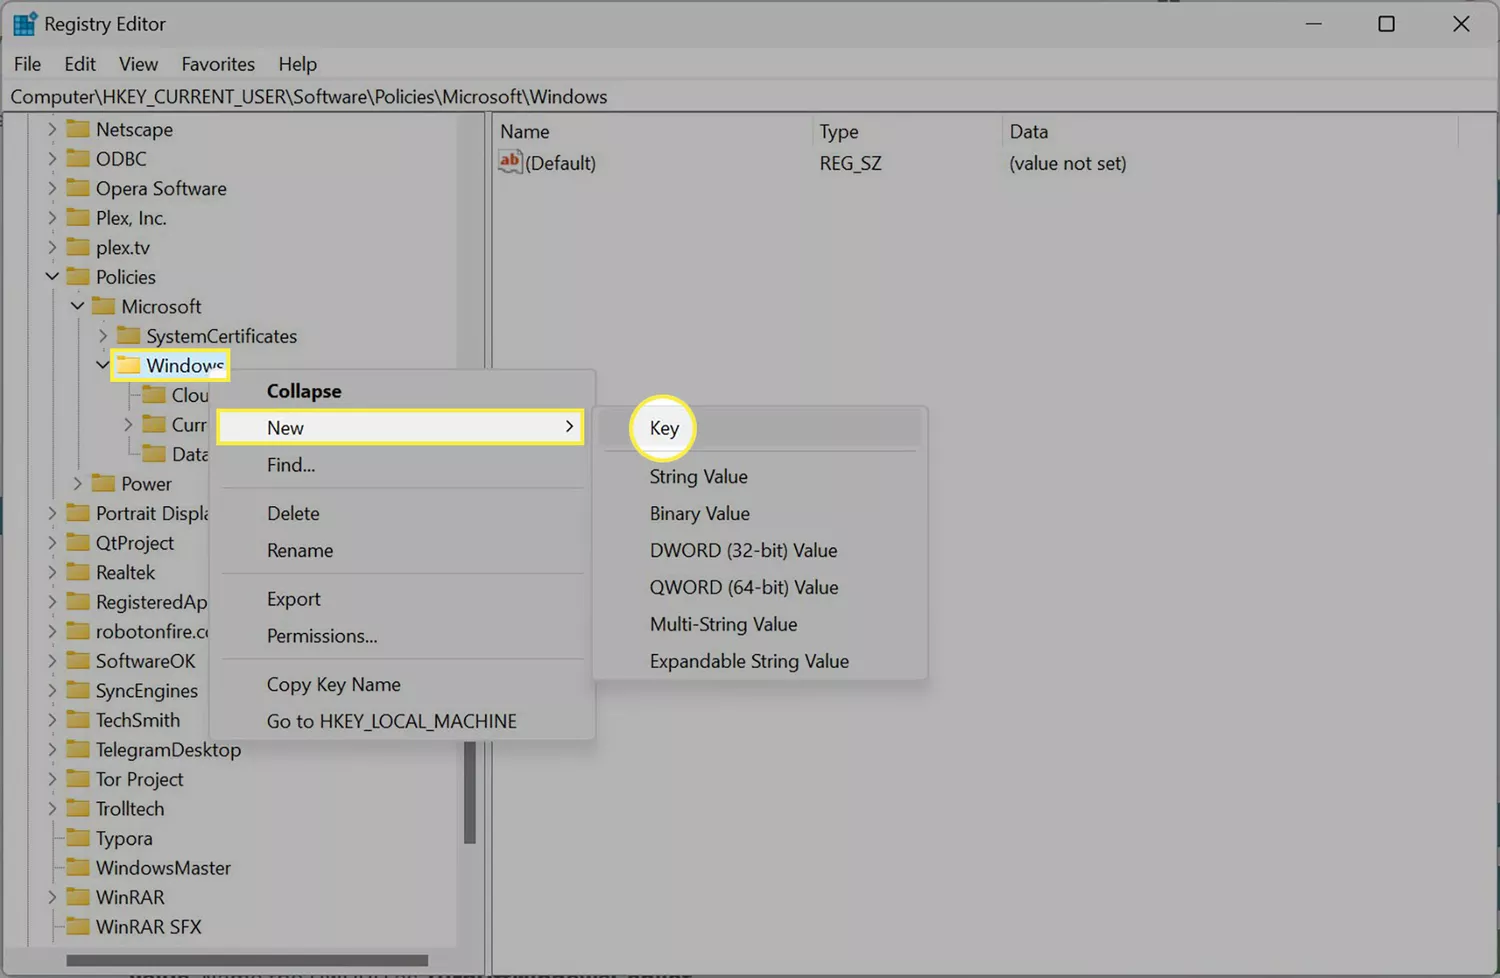
- Right-click Windows, and then select New > Key. Label the key as WindowsCopilot.
- Right-click the new WindowsCopilot key, and then select New > DWORD (32-bit) Value. Name the DWORD TurnOffWindowsCopilot.
- Double-click the TurnOffWindowsCopilot option and type 1 in the Value Data text field. The Base should be the default “Hexadecimal”. Press OK.
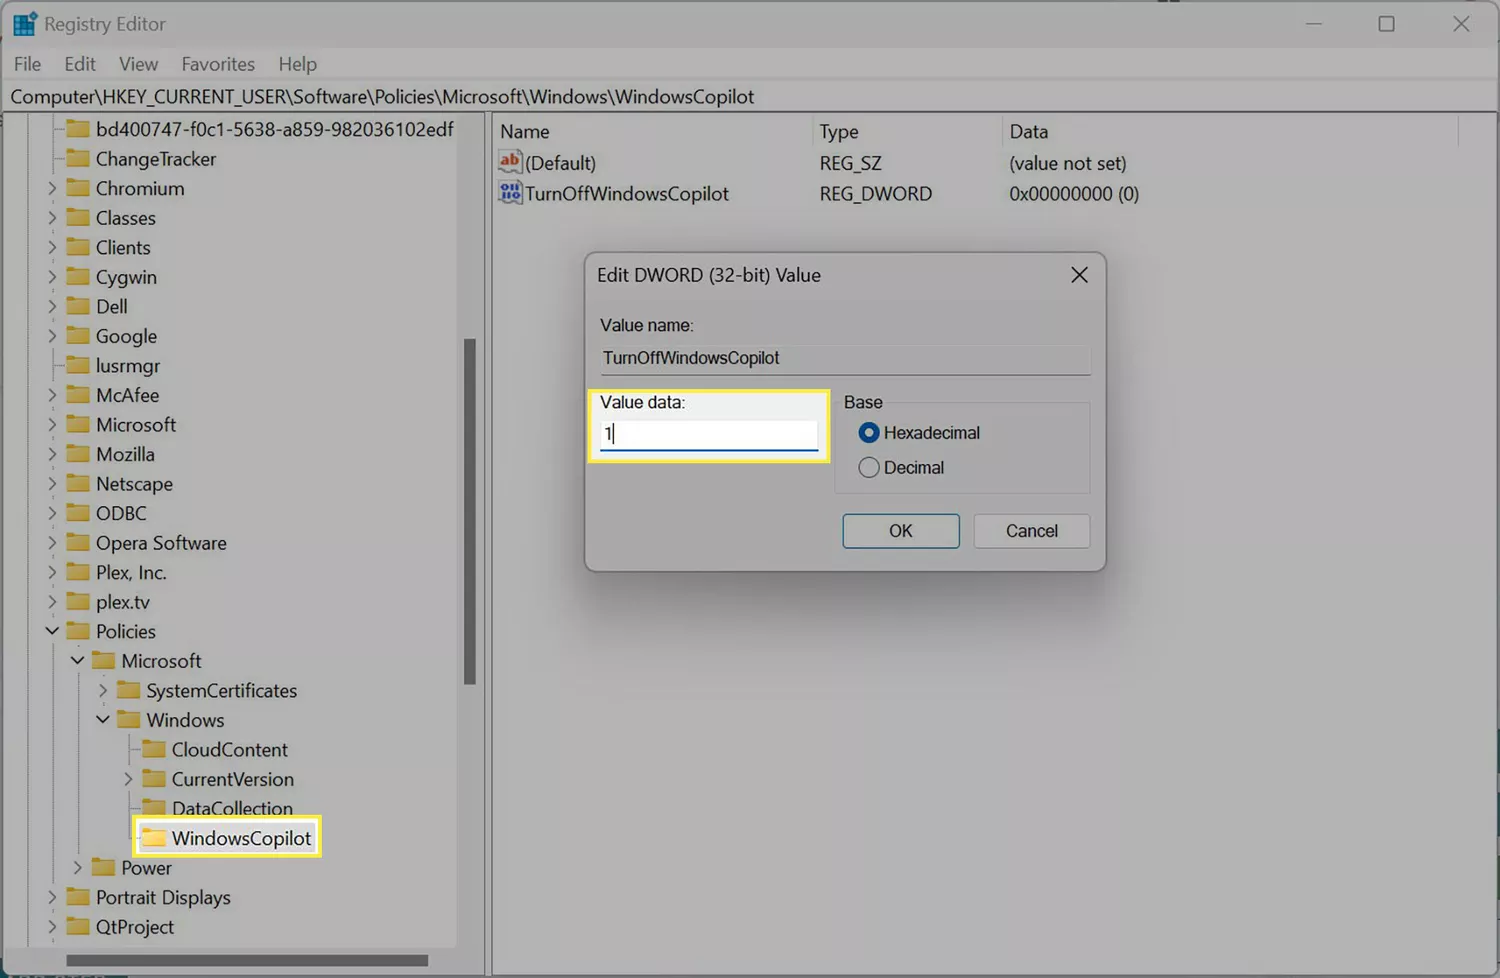
- Restart your PC for the changes to take effect. The Copilot toggle switch will also disappear from Settings.
How to Disable Copilot With Group Policy in Windows 11
The Group Policy Editor is an administrative tool available in higher editions of Windows. Users and admins use it to manage policies within a system-wide networked environment, and they can also access the Copilot setting.
- Open Start, type “Group Policy Editor” in the search field, and then press Enter.
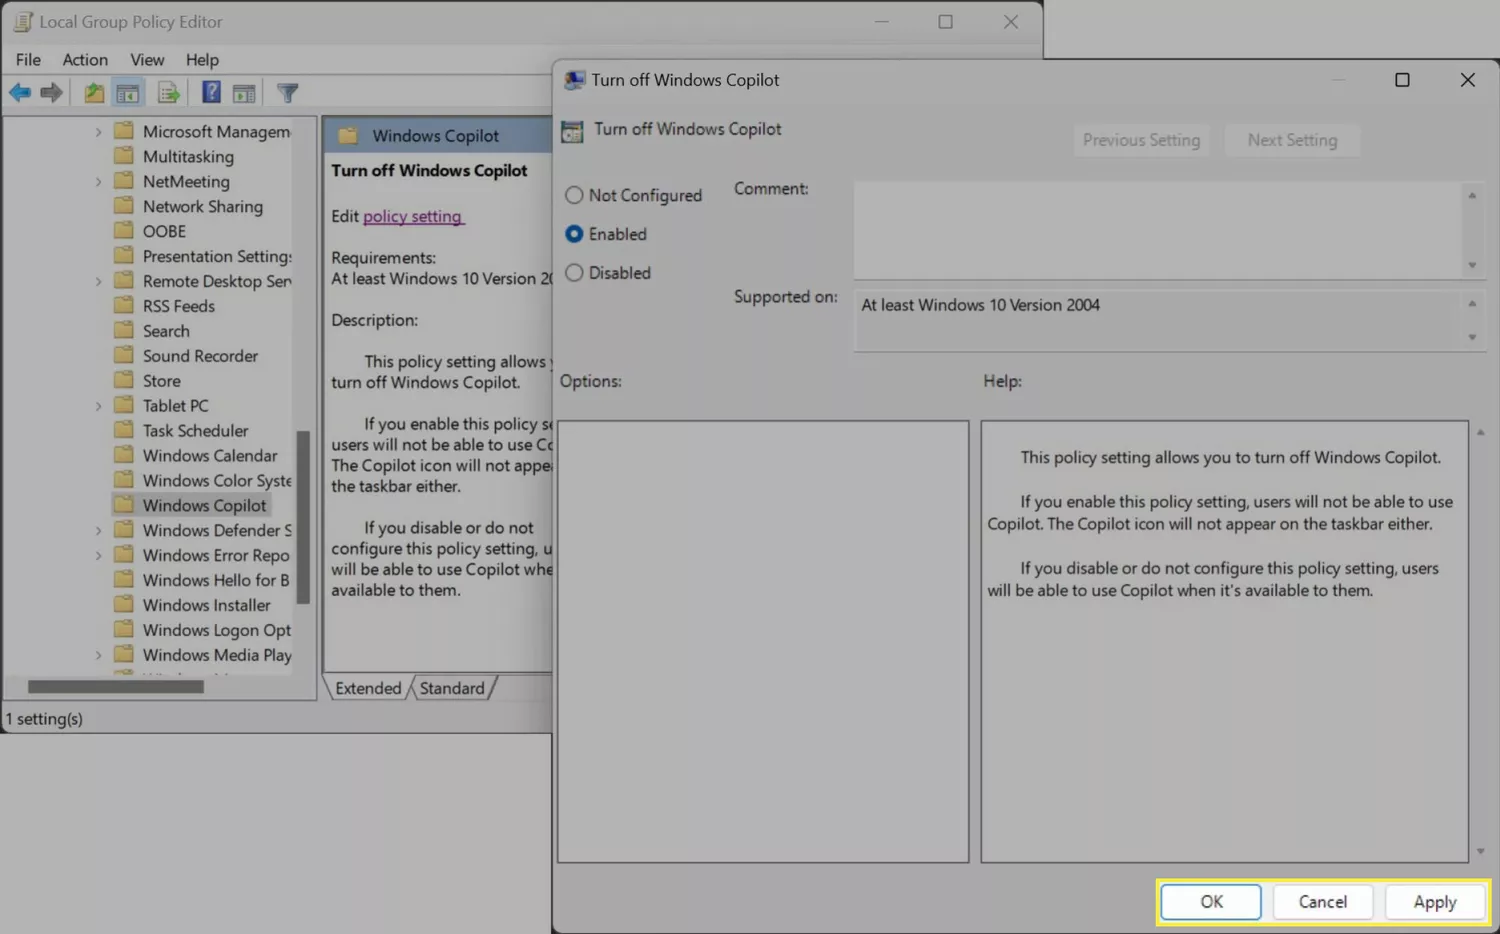
- In the Group Policy Editor window, navigate to the following path:User Configuration > Administrative Templates > Windows Components > Windows Copilot
- In the right pane, right-click Turn off Windows Copilot and select Edit.
- The Turn off Windows Copilot dialog box will appear with several options. Choose Enabled to disable the Copilot button in Windows.
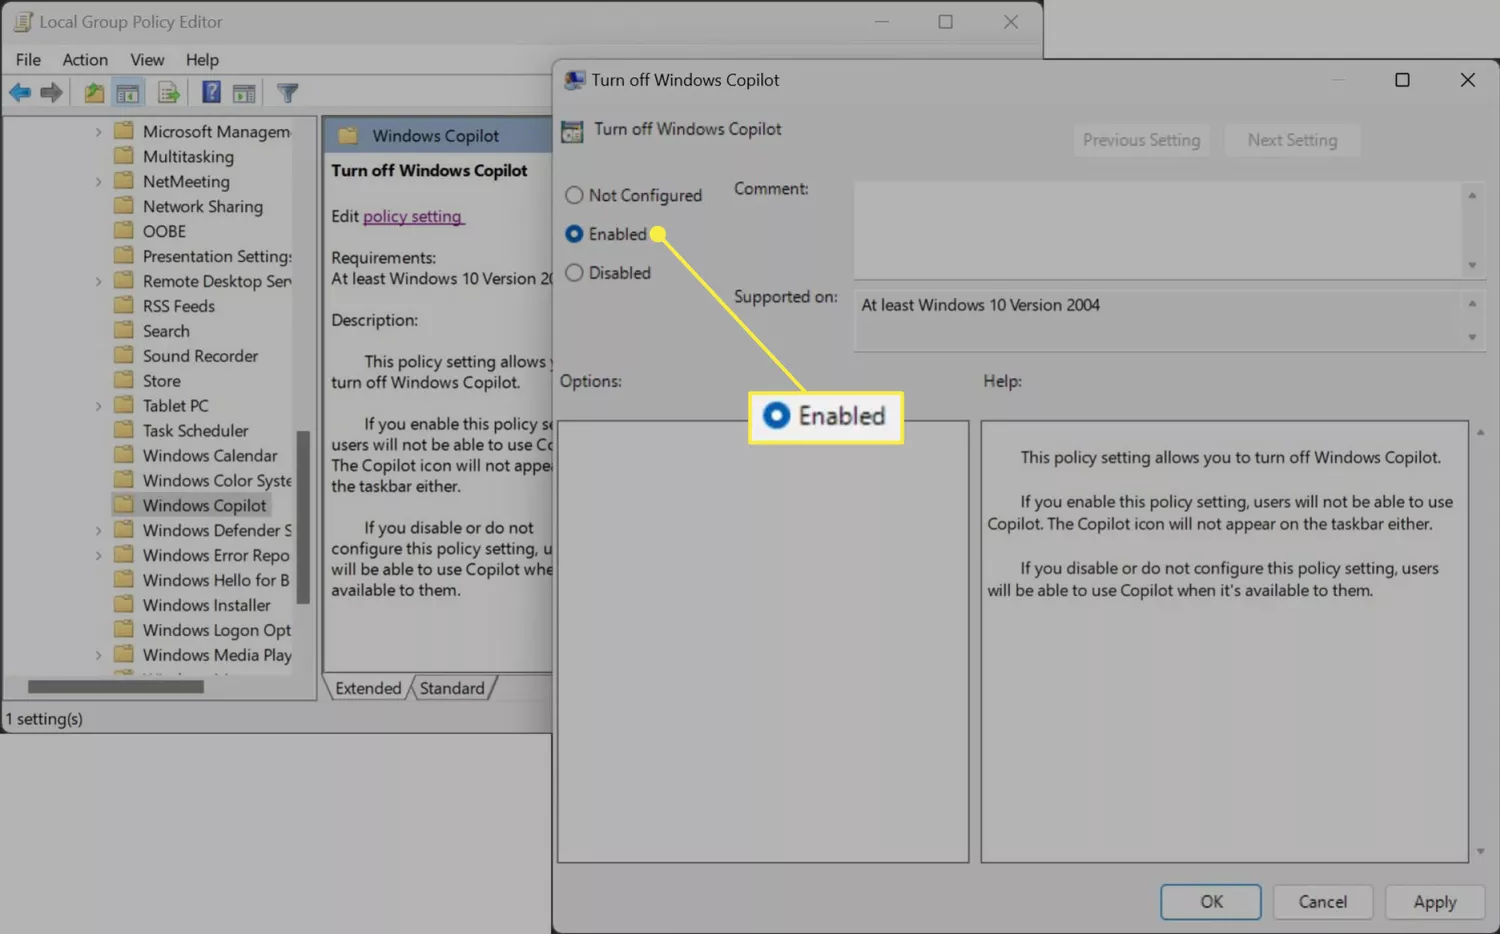
- Click Apply and OK. Restart your PC for the changes to take effect.
- To undo these changes, select the Disabled radio button and restart your PC again.


